Login Form

Q1 Plans Chapter 17 Page 17-5

PROPELLER INSTALLATION

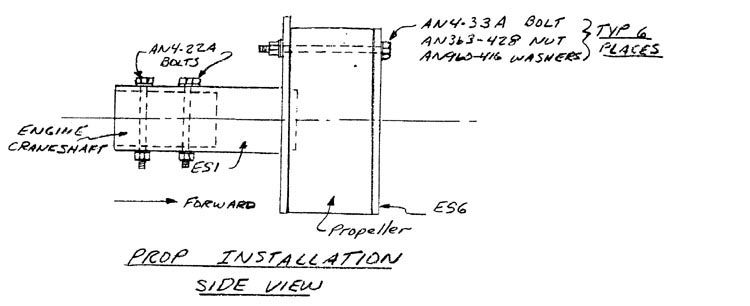
The ES1 prop extension comes drilled for installation on the engine crankshaft. It also comes with the six prop bolt holes.

The first step is to drill the prop holes using the ES1 holes as a guide. The best way to do this is to clamp the prop to the ES1, drill one of the holes through, then put a bolt in the hole and tighten it up. This will hold the prop in the proper position in relation to ES1 while you drill in the remaining five holes. It is very important that the counterbalance portion of the ES1 be oriented as in the sketch; it should be 90 deg. plus or minus 5 deg to the propeller axis.

Once the prop holes are drilled, you can take the ES6 plate and drill those six holes in the same way.

AN4-33A bolts join the sandwich together. the sandwich consists of the ES6 plate, the prop, the ES1 prop extension.

The ES1 is mounted to the engine crankshaft with AN4-22A bolts.
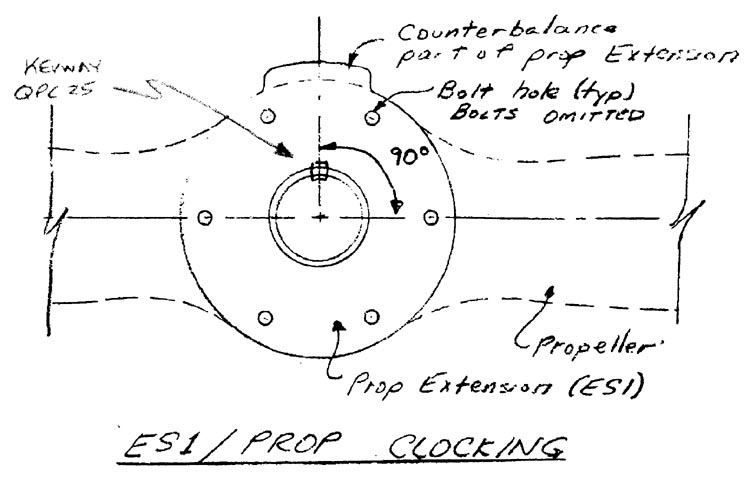
Quickie ES1 Prop Clocking

Quickie Prop Installation Detail

FITTING THE COWLING

The cowling must be fitted and installed after the engine is installed on the firewall. This is so that the cowling can be trimmed at the firewall edges to allow a minimum of 1/4” clearance between the aft face of the propeller and the forward face of the cowling; i.e. you don’t want the propeller rubbing against the cowling!

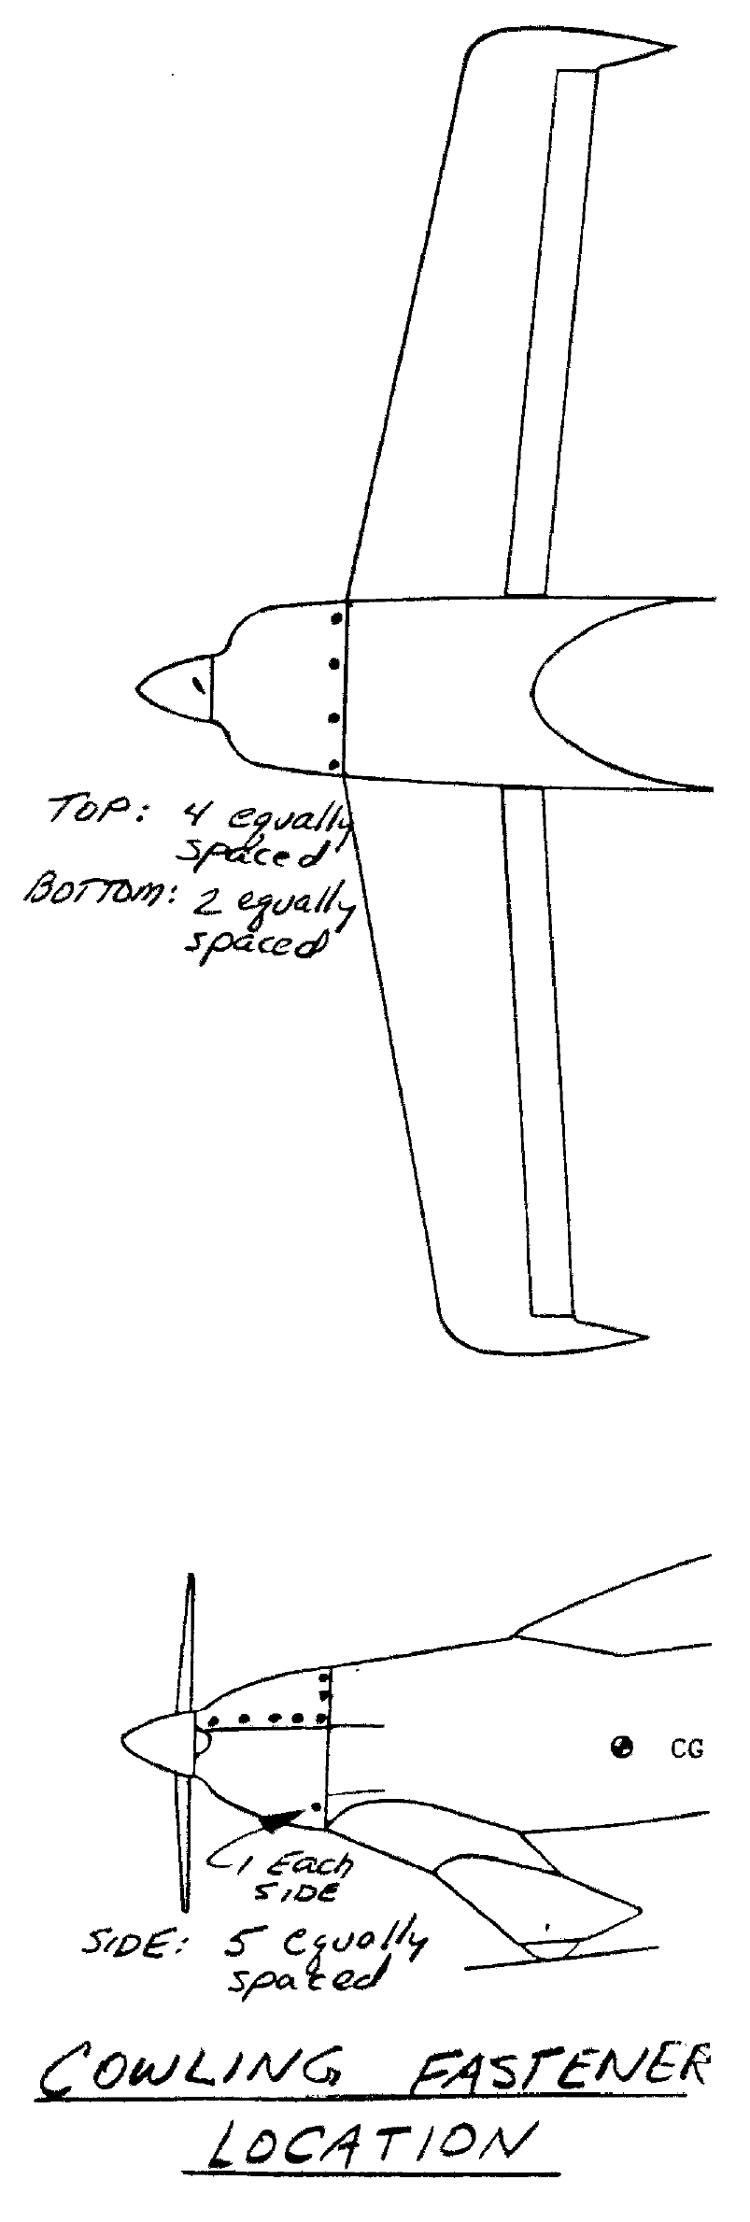
Bent up angles of .032” aluminum are riveted to the firewall. The cowling is joined to these angles with nutplates and screws. The accompanying sketches detail the cowling installation.

You may find it easier to fabricate a template to slide over the prop shaft so as to support the front end of the cowling while you fit the cowling to the firewall.
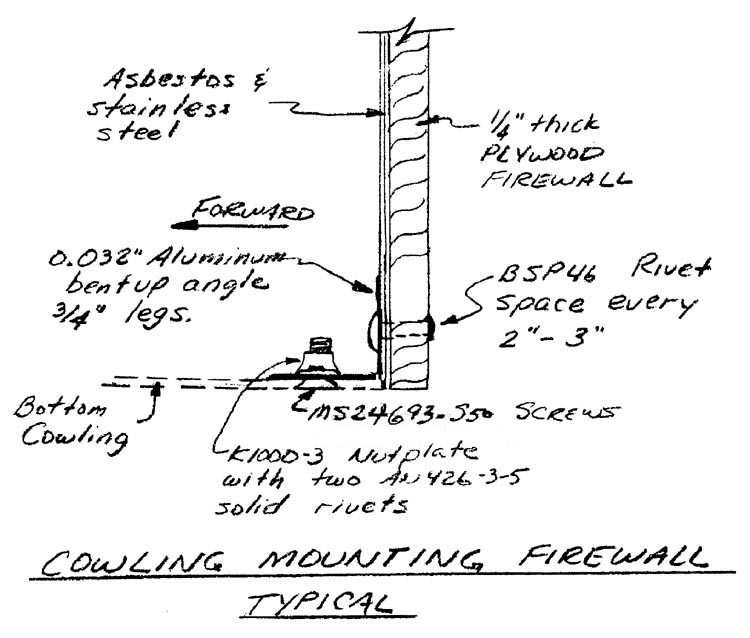
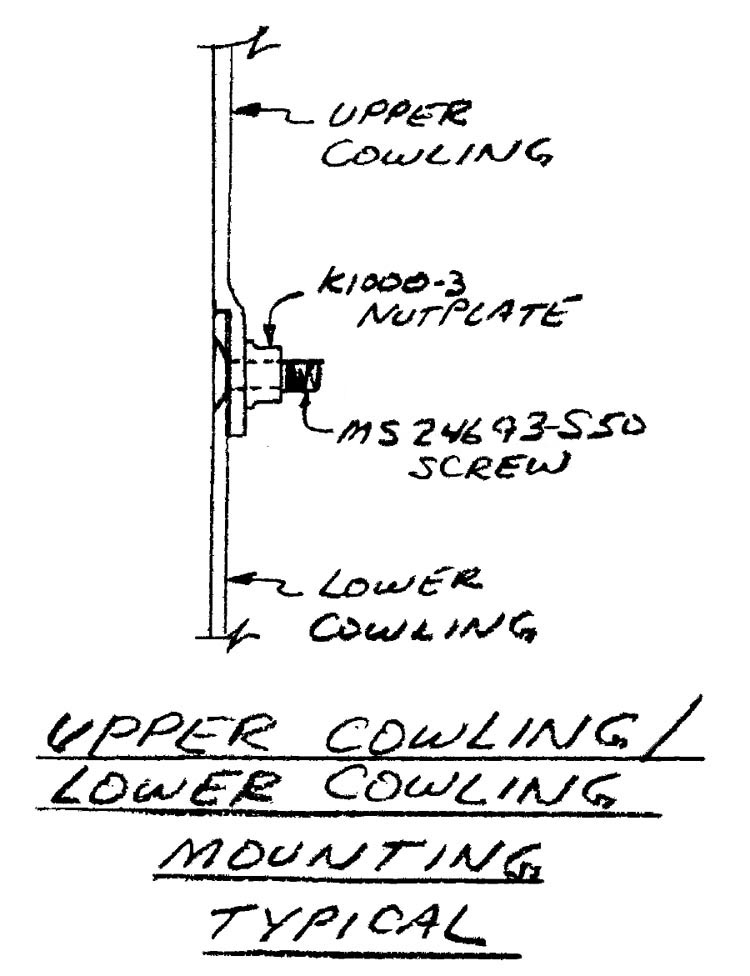
Quickie Cowling Mount Detail

Quickie Cowling Mount Detail

Q1 Plans Chapter 17 Page 17-6

INSTALLING THE ENGINE BAFFLING

Insuring that your Quickie engine cools properly is a very important part of the construction of your Quickie. Please read this section carefully, make sure that you understand the principles involved, and take your time performing the actual work.

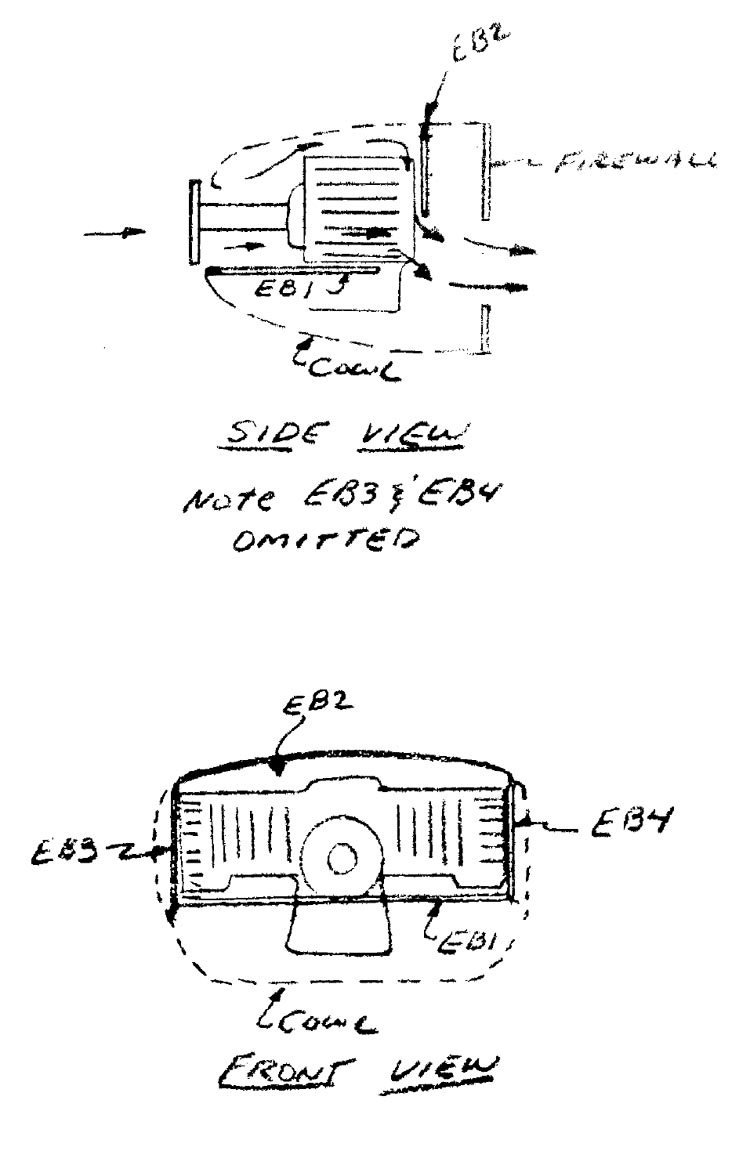
The Quickie uses an air-cooled engine. The cooling air enters the front of the cowling through the large inlet h1e. The engine baffling insures that the air flows accross the cylinders, down the backside of the cylinders, and then exits out the ar outlets (one on each side of the fuselage at the firewall). Maximum efficiency and performance can be cbtained only if the baffling is air-tight so that the air will not escape to other locations within the cowling. Any air that escapes can obviously not be used for cooling. This will raise engine teinperatures, or require more initial cooling air; either result is undesirable.

Quickie Cowling Screw Detail

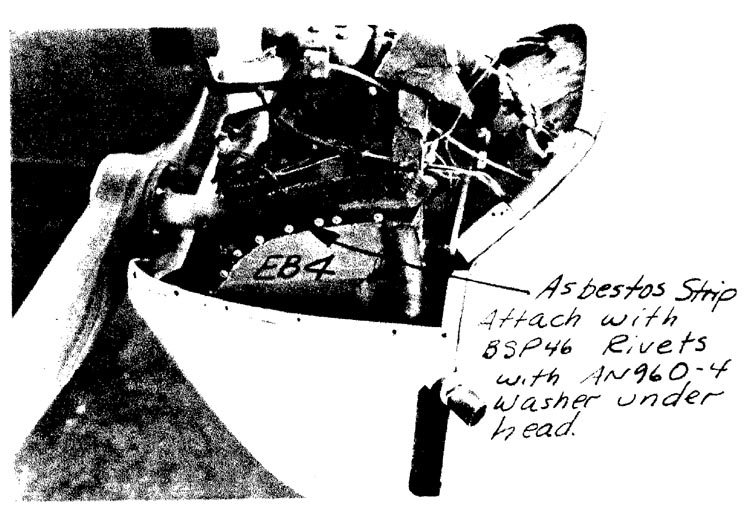
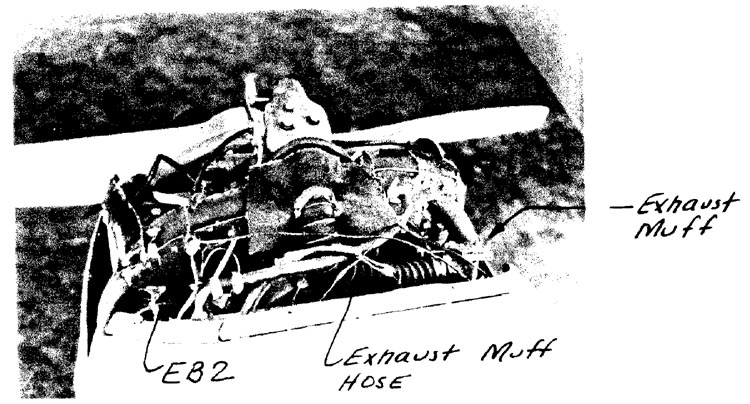
Approximate patterns for the engine baffles (EB1 thru EB4) are included here and on Appendix Sheet 7. These patterns are approximate, and do not include holes for exhaust pipes, engine controls, etc

Rather than try to make the metal baffles fit perfectly together and conform exactly to the inside shape of the cowling, asbestos strip riveted to the baffles are used to seal off the last 1/2 to 1” between the baffles and the inside of the cowling. Asbestos and RTV are used to seal up joints and holes in between the baffles. The work will involve much trial and error and will require the installation and removal of the cowling many times. Go slow and do the job right the first time.

Short, bent up angles out of 0.032” aluminuu are used to mount the baffles to the engine and each other. Since the engine does vibrate, properly securir the baffles is important. Remember that the baffles must be removable for maintenance on the engine. Therefore, nutplates should be used where necessary to allow the baffles to be disassembled. The bolts on the engine that may be used to secure the baffling have been painted red for easy identification. The exception to this are the two bolts on the engine block, directly above the :Eront bearing casting, which are painted reds and are used to mount the ignition coil.

Quickie EB4 Detail

Quickie EB2 Detail

Quickie Engine Baffling Detail