Login Form

Q1 Plans Chapter 15 Page 15-4

After the layup has cured for one day, remove the lumber, break the bondo joints, and remove the canopy-forward cockpit cover assembly.

Make sure that all edges of the plexiglass are radiused, and that the plexiglass that will be glassed onto is dulled. As tI sketch shows, two BID tapes are wrapped around from the inside plexiglass around the stiffener onto the outside plexiglass. As you can see, the grey tape controls how far up the plexiglass the layup will go. At the aft canopy bulkhead, two BID are wrapped around inside and out. At the forward, curved edge of the canopy, you have already laid up the outside two BID, but radius the inside edge and lay up two BID there also.
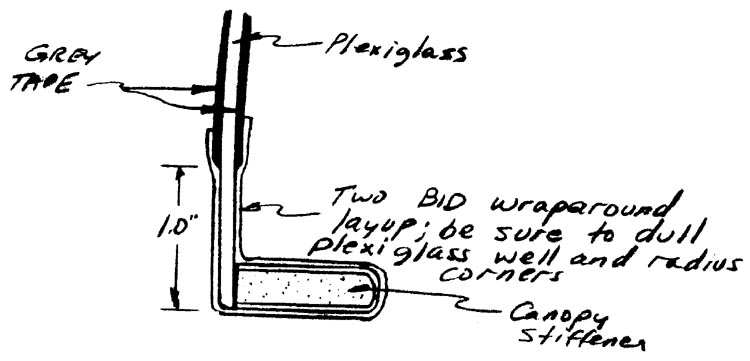
BID Fiberglass on the Quicky Canopy

In order to make sure that the canopy doesn’t warp during curing, place siran wrap on the fuselage longerons and place the canopy-forward cockpit cover in the proper position until cured.
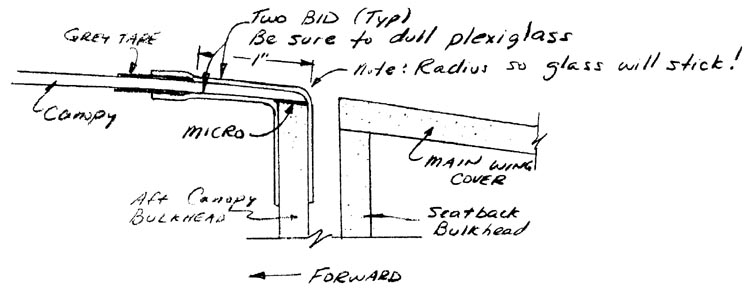
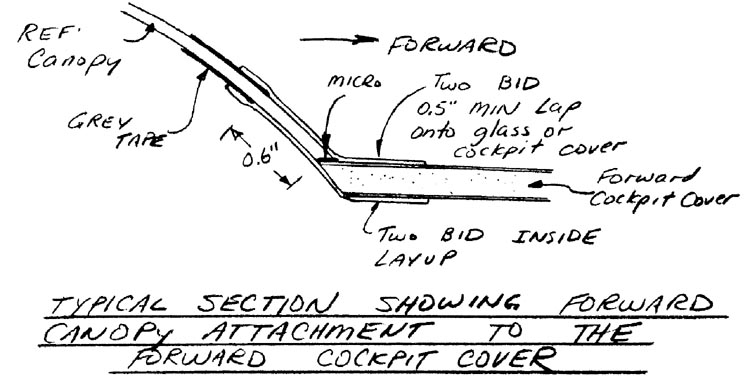
Quickie Canopy Attachment Detail

Quickie Canopy Attachment Detail

Trimming the glass layups that overlap the grey tape is best done with the rotary file attachment and the Drecnel. If you don’t have a Dremel, you can buy a rotary file attachment for your 1/4” drill. In any case, be very carefull that you don’t nick the glass while removing the excess layup. A nick in the plexiglass could very easily cause a crack to develop. Use the bottom edge of the grey tape as the trim line.
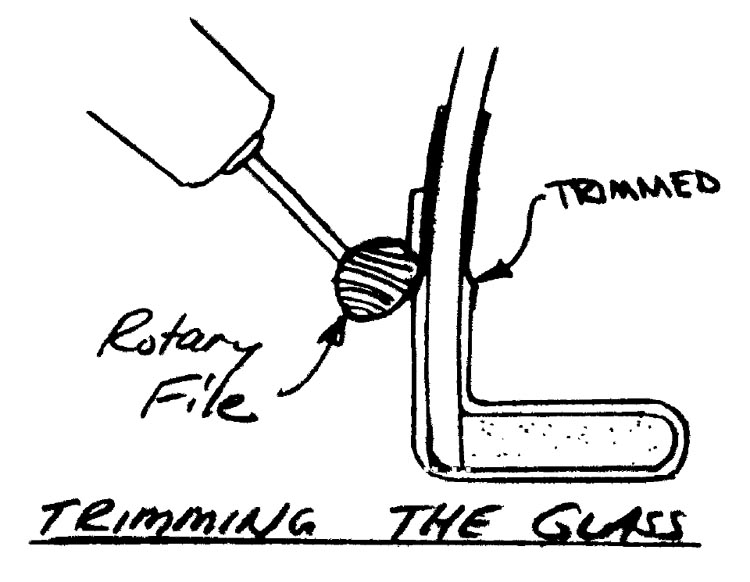
Trimming the Fiberglass on the Quicky Canopy

Q1 Plans Chapter 15 Page 15-5

FORWARD CANOPY SEAL

Before doing this step, the canopy should be permanently attached to the forward cockpit cover.

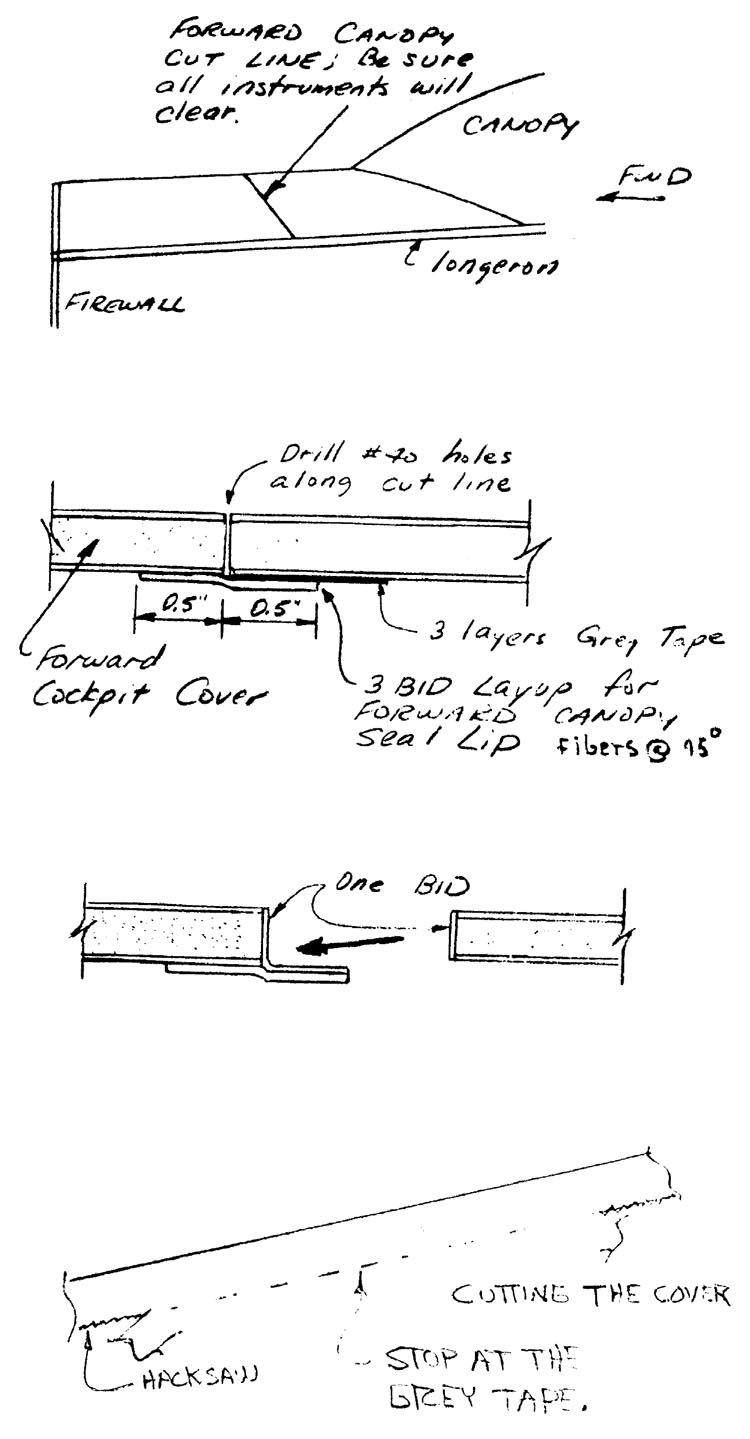
The forward cockpit cover is cut so that the canopy can swing open after the front part of the forward cockpit cover has been glassed to the aircraft. Included in this section are the details for making a seal for this joint to minimize air leaks.

Begin by deciding where to cut the forward cockpit cover. To do this)trial fit the instruments and note how far forward they project, including the pitot static tubing(see Chapter 16). Since the instruments remain with the canopy as it is opened, you must make sure that they will clear the front(fixed) part of the forward cockpit cover. Draw a line on the cover to represent the cut line. It is suggested that you make this line slant aft, as shown, in order to provide a “clamping” effect as the canopy is closed.

Next, drill several #40 holes along the cut line so that it may be redrawn on the inside face. Then layup grey tape as shown. Finally, layup a three BID lip, as shown, on the inside face of the forward cockpit cover. Let it cure før a day.

Now you can go ahead and carefully cut the forward cockpit cover along the cut line, being careful not to cut through the lip. Use a hacksaw.

Lay up one BID lapping, onto the lip to protect the orange foam. Another layup of one BID protects the bare foam of the edge of the canopy.

Quickie Forward Canopy Seal Detail

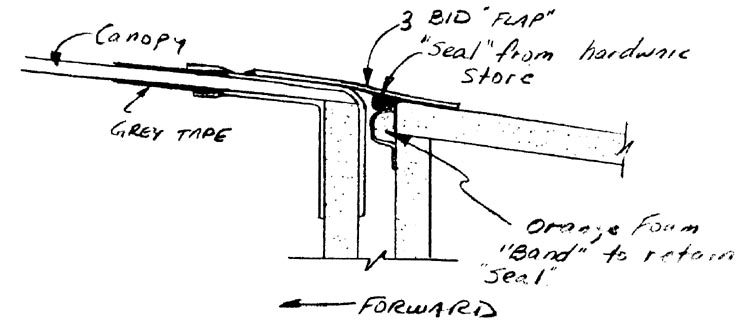
AFT CANOPY SEAL

The aft canopy seal prevents air leakage into the cockpit.

The three BID flap can be laid up on the aircraft using Siran wrap on the seatback bulkhead to keep the glass from sticking.

The orange foam band retains the seal that you obtain from any hardware store. The foam can be glassed or just painted with epoxy.

The flap alone will prevent most of the air leakage.

Quickie Afte Canopy Seal Detail