Q1 Plans Chapter 3 Page 3-11
- Details
- Category: Quickie Plans
- Published: Sunday, 09 November 2008 00:00
- Written by Dan Yager
- Hits: 6917
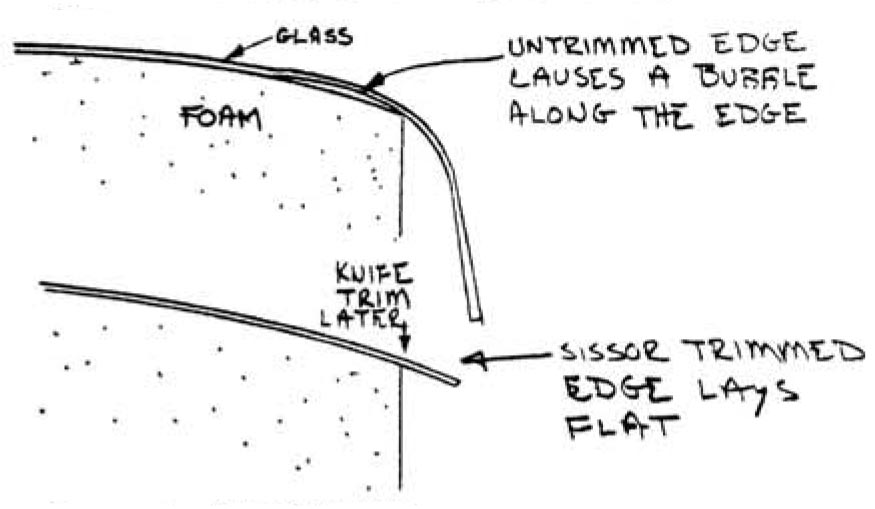
As you wet out each ply, scissor trim to within ½” of any overhang (trailing edge, etc.). This ½” will be knife trimmed after the layup cures. If an overhanging ply isn’t trimmed, it lifts the edge up and makes a bubble. After scissor trimming, restipple the edges to be sure there are no voids. Wet the cloth beyond the trim line at least ¾” to allow easy knife trimming later.

Step 7: Squeegeeing
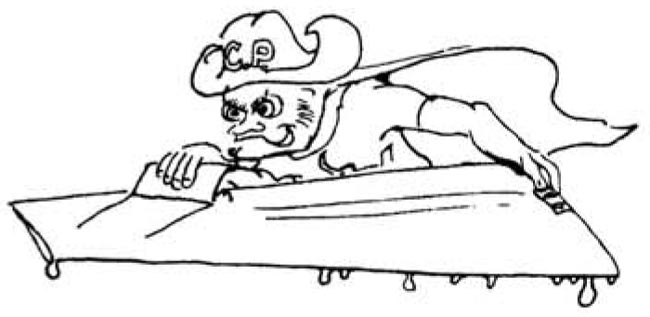
Squeegee out excess epoxy. This involves drawing a plastic or rubber squeegee over the layup as shown. Plastic squeegees (scrapers) are available at any paint store. If excess spoxy exists, it will be pushed off the edge of the piece. Remember, excess epoxy is much better on the floor than on the airplane. It is possible to squeegee too hard and make the layup too dry. If this occurs, the surface will appear white, indicating the presence of air. If this occurs, wet the cloth by painting on a little epoxy and stippling it down into the layup. The best quality layup is obtained if each layer of a multilayer layup is squeegeed. The excess epoxy which is pushed off the edge can be recovered and returned into the cup. This is easily done by catching the epoxy on the squeegee and scraping it on the side of the cup.
The finished layup should appear smooth and green so that the weave of the cloth is clearly visible, but not so dry that any area appears white in color. If you’ve done an excellent job, the weight of resin will be about 2/3 of the weight of cloth used.
To check if there is too much epoxy in the lsyup, pull a squeegee across the surface, stopping before you reach the edge. Lift the squeegee up and look for a large “ridge” of epoxy where the squeegee stopped. The ridge under the top ply indicates that the layup is too wet and you should spend time with the squeegee to remove epoxy off to the sides.
Don’t hesitate to use your stippling roller or brush on an area after squeegeeing. Some places are not suited to the use of a squeegee and the dry brush or roller must be used to expel the excess epoxy. On a given layup, about ½ of your time should be spent stippling or squeegeeing.

Step 8: General Inspection
After you have finished the layup, take a few minutes and give it a general inspection for trapped air, dry glass, excess epoxy, and delamination. It is much easier to correct these things while the layup is wet than to repair the cured layup. Also, have someone else inspect it. usually a different person can find air flecs or bubbles that are missed by one inspector. Carry a good light around for the inspection. Glance the light off the suriace at various angles to look for airflecks. If any air is visible, stipple it out. Be sure the overlaps on the edges are perfect. If, due to a-sharp corner etc, you have a problem eliminating an air bubble, use one of the following two methods; (1) Lift the cloth up off the foam, trowel some wet micro into the troublesome area, add more epoxy as you stipple the cloth back down. (2) Add excess epoxy over the bubble, cover the surface with Saran wrap (thin plastic wrap) then push firmly outwards to force the air out to the sides. The Saran wrap will seal the surface to keep air from being drawn in. This method will force the cloth to stay down, even around a sharp corner.
Step 9: Preliminary Contour Fill
Certain areas, like over the spar and a along the trailing edge (see cross—section views) require a dry micro fill. It is preferred to apply this fill within 2—3 hours of finishing the fiberglass layup. However, where the micro filler obscures the structure underneath, like over the spar cap, FAA inspection should be completed before dry micro filling. Areas like the trailing edge where the structure can be inspected from the other side should be filled while the layup is still tacky (within three hours of the layup). If you wait until the layup cures, you will have to sand the fiberglass surface to a dull finish before applying the micro. So, mix up a "dry" micro mix and trowel it into the low areas while the layup is still wet and save the work of sanding where feasible.
Step 10: Cleanup
Brushes can be used two to three times if after each layup they are washed with soap and water. Wipe excess epoxy off with a paper towel. Wet the brush & work soap into all fibers by mashing it into a bar of soap (Lava brand is best). Rinse with hot water and repeat 3 times. Be sure they are dry before next use. We generally use a cheap brush (approximately $2.00 to $4.00 per dozen) and discard after two or three layups. Clean squeegees the same way.
If you use skin barrier cream (Ply No. 9) the epoxy and cream will wash off easily with soap and water. When you get epoxy on unprotected skin, Epocleanse is used to remove the epoxy. Both of these products are available through RAF distributors and are listed in the bill of materials. Once you are sure your skin is clean, wash again thoroughly with soap & water, even if your hands were protected with plastic gloves. If you get epoxy on tools or metal parts, clean them with acetone or MEK before the epoxy cures.


