Q1 Plans Chapter 15 Page 15-4
- Details
- Category: Quickie Plans
- Published: Monday, 12 May 2008 10:28
- Written by Dan Yager
- Hits: 2014
After the layup has cured for one day, remove the lumber, break the bondo joints, and remove the canopy-forward cockpit cover assembly.
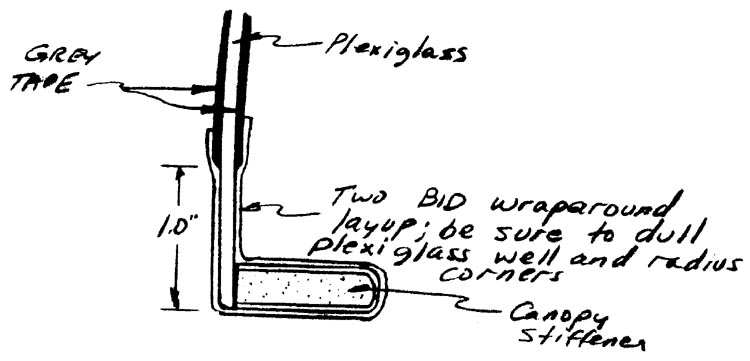
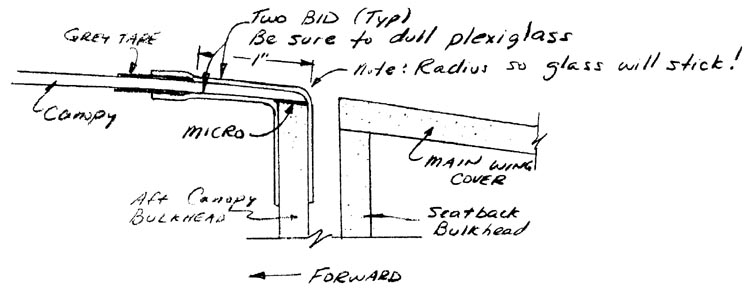
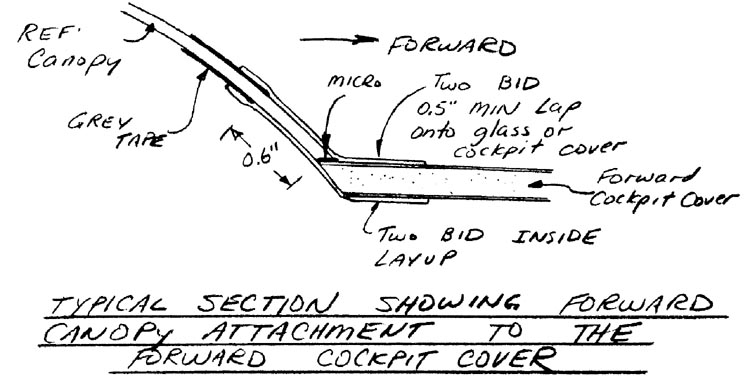
Make sure that all edges of the plexiglass are radiused, and that the plexiglass that will be glassed onto is dulled. As tI sketch shows, two BID tapes are wrapped around from the inside plexiglass around the stiffener onto the outside plexiglass. As you can see, the grey tape controls how far up the plexiglass the layup will go. At the aft canopy bulkhead, two BID are wrapped around inside and out. At the forward, curved edge of the canopy, you have already laid up the outside two BID, but radius the inside edge and lay up two BID there also.

In order to make sure that the canopy doesn’t warp during curing, place siran wrap on the fuselage longerons and place the canopy-forward cockpit cover in the proper position until cured.


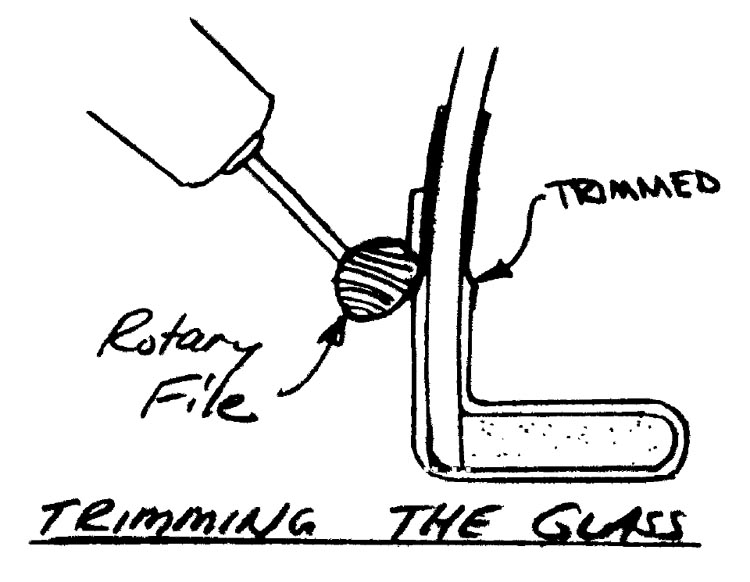
Trimming the glass layups that overlap the grey tape is best done with the rotary file attachment and the Drecnel. If you don’t have a Dremel, you can buy a rotary file attachment for your 1/4” drill. In any case, be very carefull that you don’t nick the glass while removing the excess layup. A nick in the plexiglass could very easily cause a crack to develop. Use the bottom edge of the grey tape as the trim line.


