Q1 Plans Chapter 17 Page 17-1
- Details
- Category: Quickie Plans
- Published: Saturday, 07 June 2008 01:00
- Written by Jun Su
- Hits: 2470
ENGINE INSTALLATION - PART 1
Note; Engine Installation - Part 2 covers the complete installation of the ONAN engine in the Quickie airframe, and is included with the Engine Package.
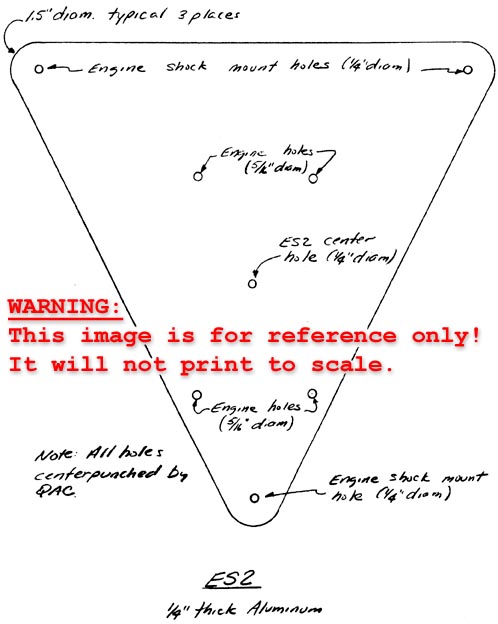
ES2
A triangular piece of 1/4” Aluminum is provided with the kit. It is made into the ES2 engine mounting plate. The plate comes to you with centerpunch marks for the center hole, the engine mount holes, and for the three 1/4” shock mount holes at the corners.
First, lay out the center hole of 5.9” diameter with a pair of dividers using the centerpunch mark provided. Do no cut this hole out at this time.
Next, you will want to drill out all of the centerpunched holes with a #40 drill bit. This is best done with a drill press but can be accomplished with a hand drill if you are very careful.
Finally, you will open up the holes as follows:
- Engine holes - 5/16” diam.
- Engine shock mount holes - 1/4” diam.
- Center hole of ES2 - 1/4” diam.
The next section on “Installing the Engine Mounts” refers to installing the shock mounts between ES2 and the firewall. Later, using the plans accompanying the Engine Package, you will install the Engine onto the ES2 Engine mount holes that you have just drilled out to 5/16” diameter.


