Q-talk 158 - Quickie Vortex Generator Instructions
- Details
- Category: Q-Talk Articles
- Published: Monday, 29 April 2013 11:21
- Written by Dan Yager
- Hits: 7985
[ EDITOR'S NOTE: In the spring of 1984, Quickie Aircraft Corporation was finally forced to admit that there "might" be some adverse affect experienced by builders flying through rain, or with bug contamination on the GU canard. They finally hinted at solution for the problem in one of their final newsletters. The instructions for installing "Vortex Generators" on the GU canard were sent out by QAC, and appear below for your convenience.]

VORTEX GENERATOR INTRODUCTION
These devices were developed for the original GU canard to reduce the effects that rain and or bugs have on the wing's lifting characteristics. Although developed by NASA for use on a different airfoil they have proven to be quite effective on the GU when flying through rain. The droplets disperse, then run off in streams between each set of generators. Normally, of course, these droplets stay on the rear portion of the canard and show a separation of flow. After testing these devices, we have found that one can expect the following:
- Slightly slower stall speed, depending on the original canard smoothness.
- Much less trim change with rain and bugs. Approximately 2° of elevator travel needed in rain.
- Lessens the need for reflex when landing with rain or bugs.
- Increased initial drag of 3 to 4 mph. However, after a few bugs have accumulated - no change.
CONSTRUCTION OF THE "GENERATORS"
The generators are made from thin white plastic. They are made in the shape of a right angle triangle which is .94" long on the base and .27" high. Cut the plastic into strips that are .27" wide. Next cut into .94" lengths. Each of these may now be cut diagonaly to form 2 generators. you will need about 70 generators per side. Cut extras so you will have spares.
VORTEX GENERATOR APPLICATION
1. Establishing the 50% chord line:
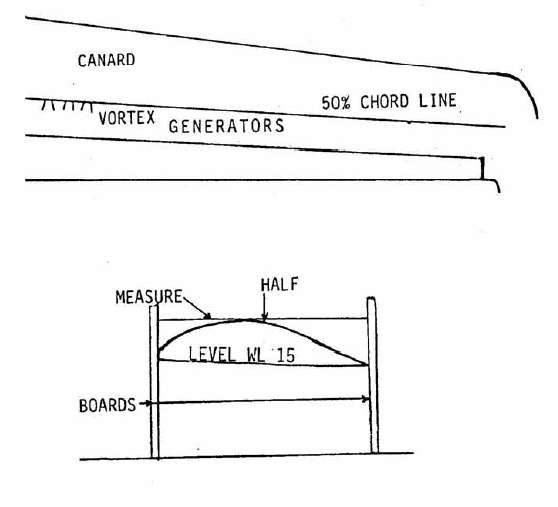
Since there is quite a curvature on the canard you must prop boards up from the leading and trailing edges that extend vertically. This will enable you to measure between the boards to get the total chord then ha lf that width down to the canard for the 50% chord lin e . Establish a point inboard and outboard so you can co nnect the two to make one line from one end to the other.

2. Establishing the Vortex marks and applying them:
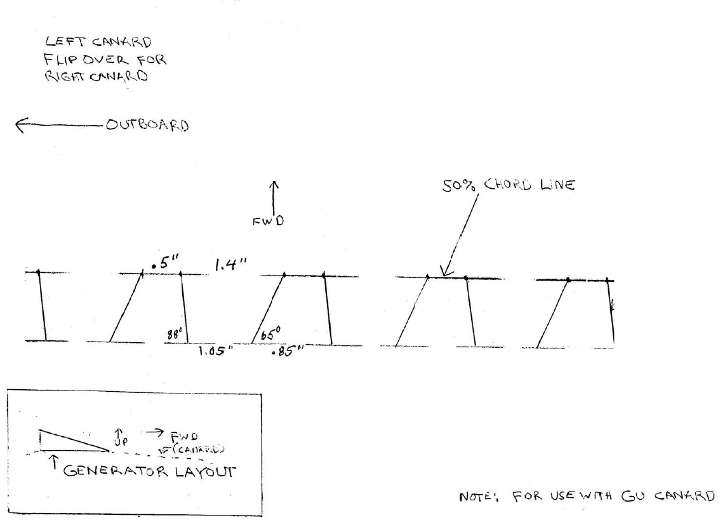
After cutting your slot out on the template, lay it out so the front edge of the generator marks are on the line then mark them. Start about 4"· out from the fuselage and go to the end of the elevator. Apply superglue to the generators and apply.

PS - You can also download a printable PDF copy of the Quickie Vortex Generator installation instructions by clicking here.


