Q-talk 158 - Q2 Wiring
- Details
- Category: Q-Talk Articles
- Published: Sunday, 28 April 2013 09:41
- Written by Harold Dirks
- Hits: 9006
Q2 Wiring
by Harold Dirks
Quickie 2 N32DK
[ EDITOR'S NOTE: Anyone who has attempted to build a Q2 electrical system using the primitive diagram in the plans will appreciate the work that went into Harold Dirks' wiring, as well as the time it took to prepare drawings and share his knowledge with the community! Thanks Harold, we all appreciate your efforts and experience.]
When building the Q2 during the late 80s and early 90s, we decided to incorporate electrical and electronic equipment like cockpit, navigation, and landing lights; as well as wingtip strobes, radio, intercom, and cockpit speaker. Wiring for all of this, in addition to the normal wiring for the battery, engine starter, ignition, and panel instruments required a detailed plan to implement it all.
This article features the wiring diagrams I prepared for our Quickie 2 N32DK. The article is not meant to be a do-it-yourself lesson; it only describes the kind of paperwork that should normally be prepared to document what is done to a plane in an electrical and electronic way. After retiring shortly before the wiring phase of the Q2 build, I had plenty of time to devote to this project. And my electronics and computer engineering background enabled me to easily design, build, and install a lot of items that others might find expensive to buy and pay others to install.
I started by using the drawing capabilities of Microsoft Word to produce several drawings that are Integrated into the four Diagrams given below.
Diagram 1 shows the DC power distribution. This diagram is separated into the following five sub-sections of the plane: baggage compartment, engine, instrument panel, firewall, and cockpit.
In some cases, the wiring goes directly from one sub-section to another. In other cases the wiring goes through multi-pin Molex connectors, which allow sub-sections like the instrument panel to be easily disconnected from the wiring and removed from the plane. Note that the wires used for the magnetos and radios are shielded to help prevent radio noise.
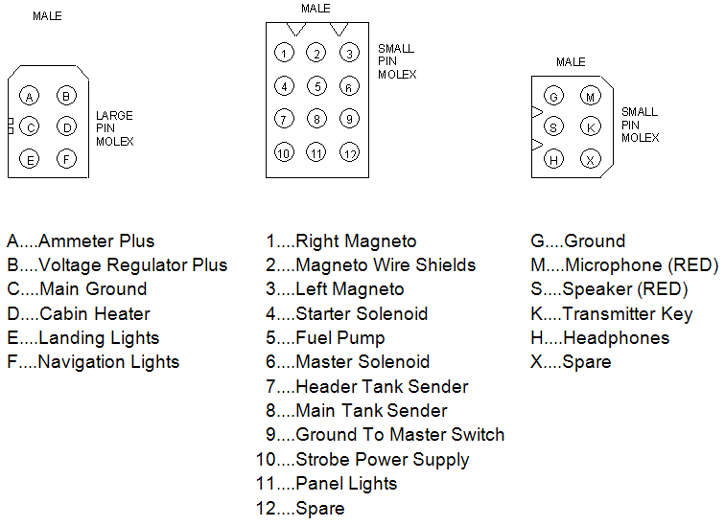
Diagram 2 shows the pin connections for the Molex connectors and the radio wiring. The radio, a NARCO ESCORT II nav/com unit, is mounted in the instrument panel. The radio has two dipole antennas. The Nav antenna has a V-shape made from flat copper strips that are built into the right side canard. Our new Com antenna is made from copper tubing and is located inside the rear fuselage. A third Com antenna was originally built into the vertical tail, but is now only available for a hand-held radio.
Diagram 3 shows the speaker box that is located behind the seatback bulkhead. The box contains the speaker and the amplifier which provides the power to drive the speaker. The amplifier is my own design and is built with parts obtained from the Radio Shack store. The speaker is normally only used on the ground to listen to the radio without wearing a headset.
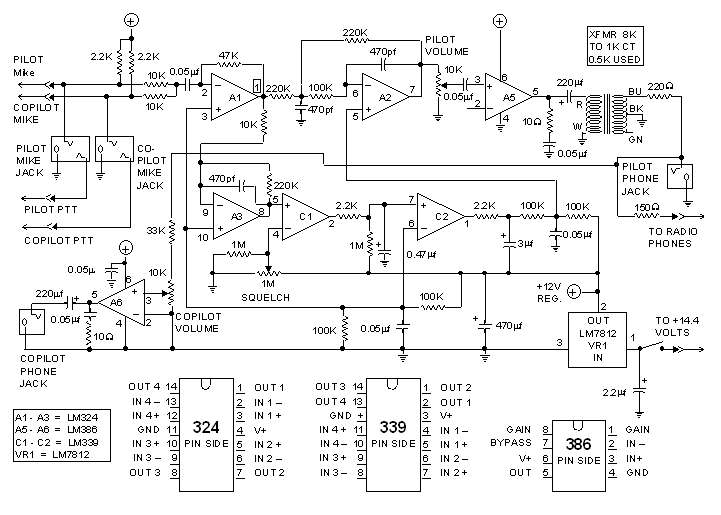
Diagram 4 shows the intercom which is also my own design and is built with Radio Shack parts, except for the headphone jacks, which are regular aircraft parts. Both the pilot’s and co-pilot’s headphones connect to the intercom, which has volume and ON/OFF controls for each pilot. The intercom is sound-operated, with a control for adjusting the turn-on threshold level. There also is a set of headphone jacks mounted on the instrument panel for use during solo flight when the intercom is not needed. (The article text and several pictures of the installed units continue after the Diagram Pages.)
Diagram 1
DC POWER WIRING DIAGRAM
(Including Magnetos and Magneto Control Switches)
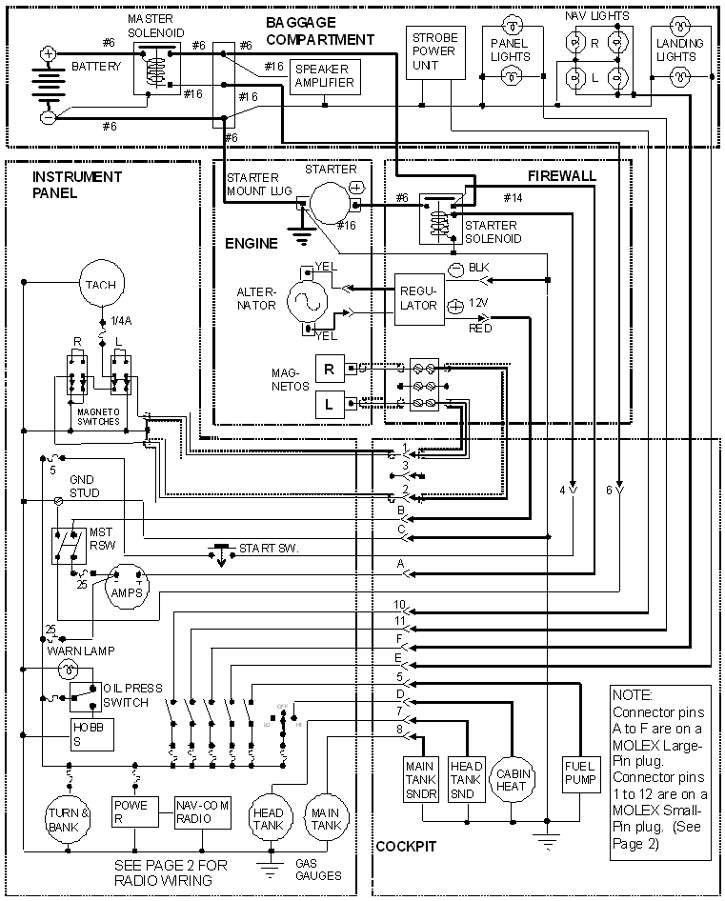
Diagram 2
MOLEX CONNECTORS
(View shown is looking at male pins on the non-wiring side of the connector)
RADIO WIRING
(Includes Headset Jacks located on Instrument Panel)
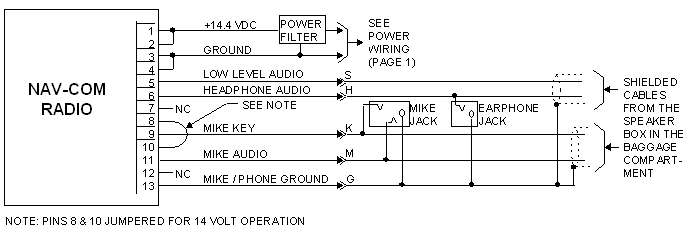
Diagram 3
SPEAKER BOX
(Located in Baggage Compartment on back side of seatback bulkhead)
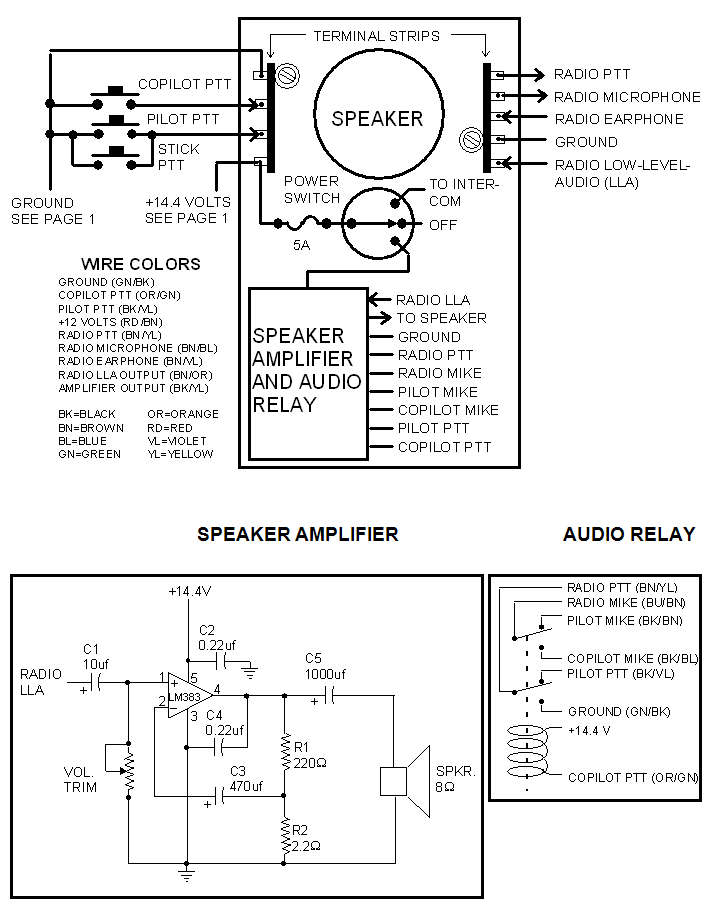
Diagram 4
INTERCOM SCHEMATIC DIAGRAM
(Intercom located in cockpit on seat-back bulkhead)
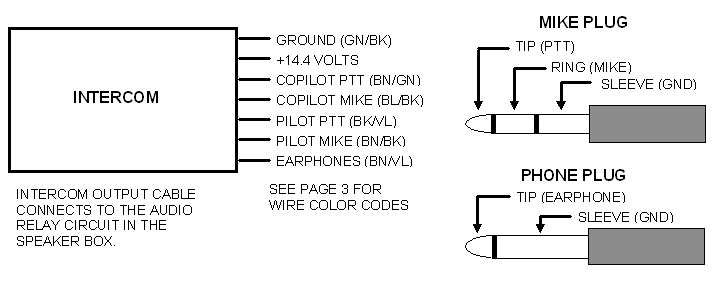
INTERCOM WIRING
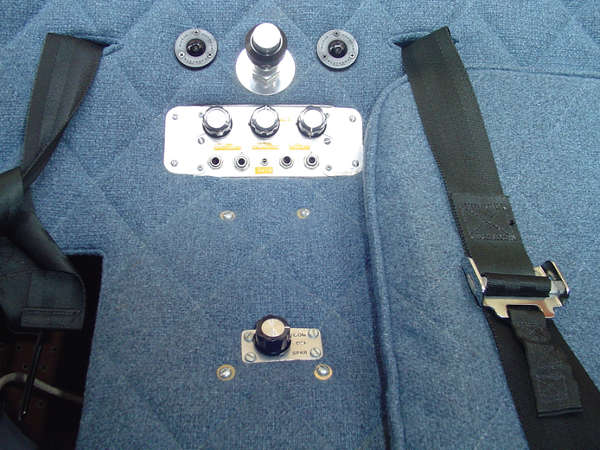
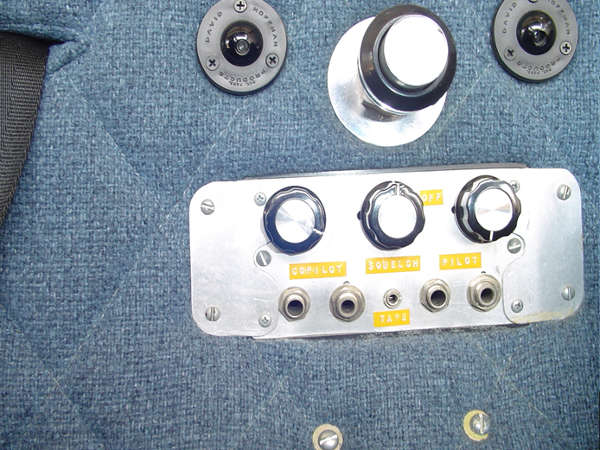
The following pictures show the cockpit lights mounted on either side of the push-pull knob for our aileron reflex control. The intercom control panel is next below and a short distance below that is the rotary, 3-position control that switches power between the speaker amplifier and the intercom. The switch positions are: intercom, OFF, and speaker. The next picture is a close-up view of the intercom control panel. Note that it provides jacks and a volume control for each headset. In the middle a small jack is provided for an audio device such as a tape recorder.
The next photos show the speaker box location on the back side of the seatback bulkhead in the baggage compartment. The battery and master power solenoid are below the speaker box in their plywood and fiberglass battery box, which is securely installed on the baggage compartment floor next to the tunnel for the rudder and aileron control cables and tubes.
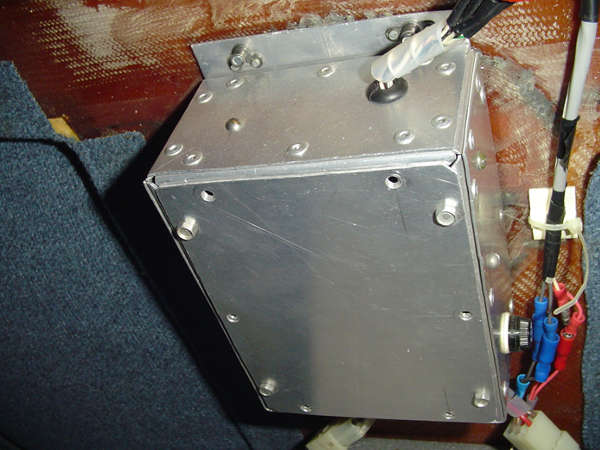
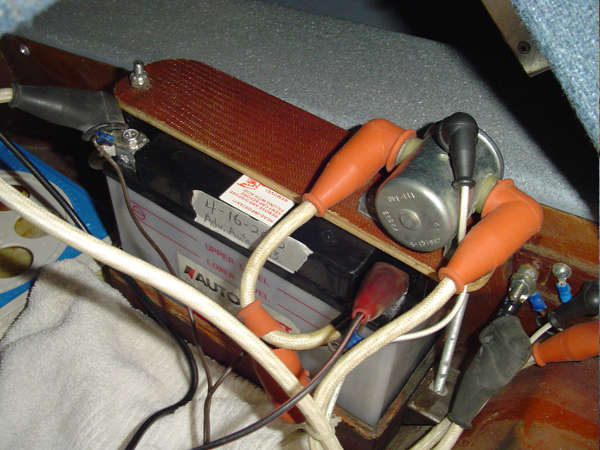
The next photos show the instrument panel with its gauges, switches, and fuses. The vertical section in front of the control stick contains the push-pull controls for parking brakes, carb heat, fuel valve, and cowl flap. The top of the control stick has a red push-to-talk switch for the radio. The arm rests on each side of the cocktail also have push-to talk switches. The next photo is a close-up of the vertical section to better show the headset jacks for use when the intercom is not needed.
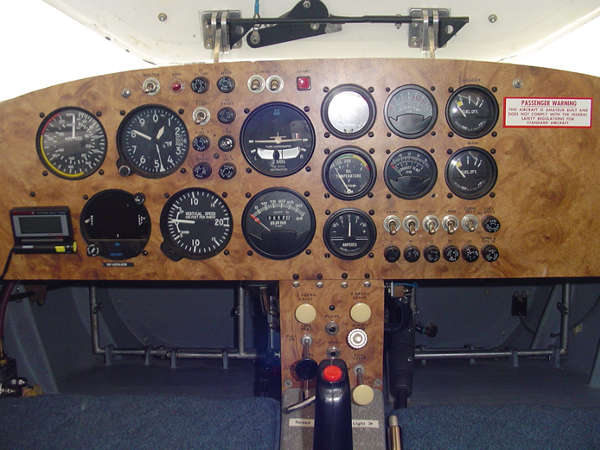
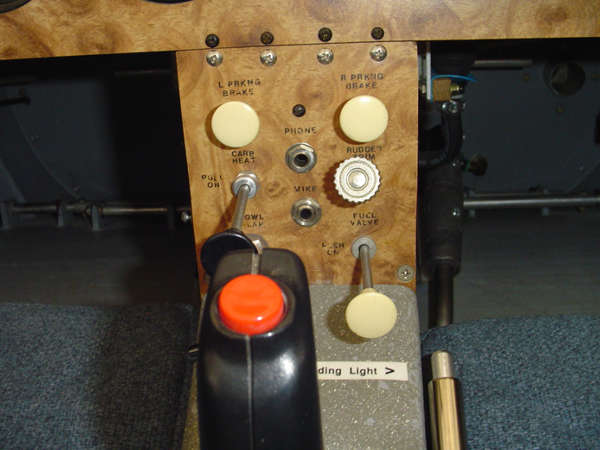
PS - Harold's original article can also be downloaded as a PDF and printed for quick reference by clicking here.


