Tri-Q Canard Removal and Modification
- Details
- Category: TriQ Plans
- Published: Wednesday, 22 December 2010 11:58
- Written by Scott Swing
- Hits: 6595
Before cutting out your canard, level the airplane and bondo asmall level board about half way out on each side of your canard.This will ensure that you get your canard back in place right andalso help keep the twist out when you are re-glassing the two halvesback together.
When cutting out your canard (if necessary) you will noticethat the rear end can cause some problems. Be patient in this areaand take care not to accidentally cut into your fuel tank.
Start your cut by drilling several 1/4" holes in line anywherealong the top of your canard by the fuselage. This will allow youto slide a hacksaw blade in to start your cut. Make sure you drillyour holes high enough so as not to drill your wing. Trim a highquality hacksaw blade with a grinder so that it will fit into yoursabre saw. It may take a few blades to finish the job but it willbe a clean cut. since your holes were up higher than your cut shouldbe, as you start cutting, angle down toward the wing then continuealong the top surface as you go around it. It is good to have someonewatching inside so you don't go into the wing. There will be someareas that you won't be able to get with the sabre saw so use a smallhand saw or hand hack saw blade.
After the canard has been removed, the excess glass must beground off of the wing so it is smooth. Next, turn the wing overand fasten it down good enough to saw your wheel pants off. Afterthese are removed you need to grind the excess off as before.
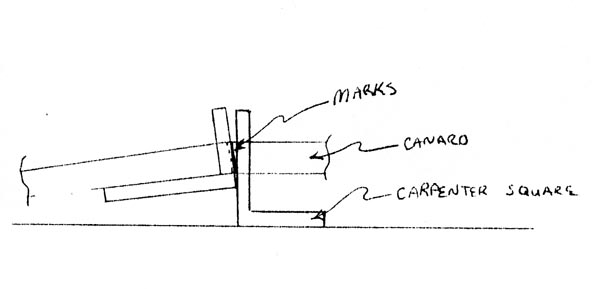
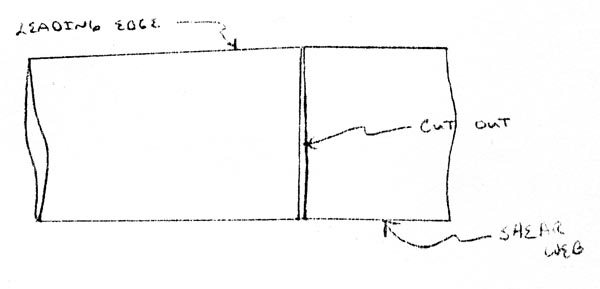
Turn the canard back up right and level it side to side toremove the anhedral. The cuts you make will extend down throughthe shear web and around the leading edge just enough to allowmovement without distortion of the bottom skin. In making your marksyou will need to use a carpenters square. Fit the square againstthe bottom of the shear web for your first mark up the shear web.Come up off your level table with the square to the shear web forthe second mark.

On top of the canard, extend those lines forwardslightly wider at the thickest part of the canard and tapering downto almost nothing on the leading edge.

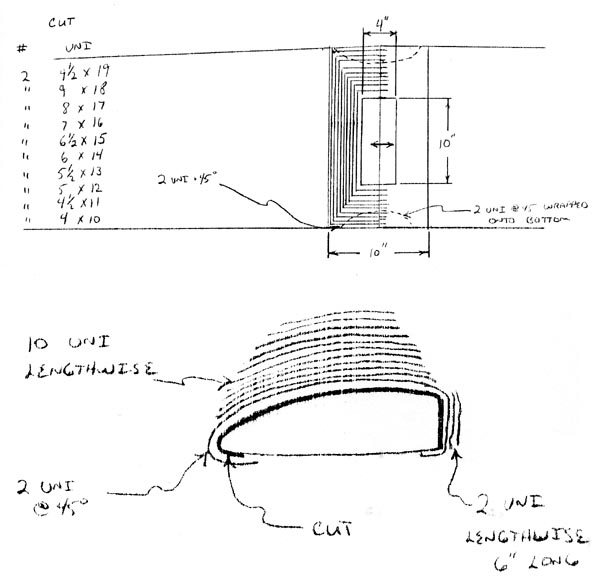
Using a sabre saw, cut along your lines at the right anglesmaking sure you don't go to far forward and hit the bottom skin withthe saw blade. Finish the cut with a small hand saw or hand hack sawblade. Raise the tips and check the fit. Try to get as close to a flatbottom as possible. When satisfied, micro the cores together. Whencured, grind (sand) the jolnt so there is no joggle as well as 5" eitherside of it for the repair. Make sure there is absolutely no shininessleft and use no finer than 36 grit for this. Before glassing makesure bo.th sides are still level. Lay-up the 2 UND @ 45° over thecanard and around the leading and trailing edges, and the 2 extraUND lengthwise on the shear web. Continue with the UND plys as shownin the drawings.


