Q1 Plans Chapter 3 Page 3-21
- Details
- Category: Quickie Plans
- Published: Thursday, 30 October 2008 01:00
- Written by Dan Yager
- Hits: 4869
3.6 Finishing Damage
Damage to the external structure by sanding in preparation for surface fill and paint can occur. Occasional sanding through the weave of the first skin ply is not ground for rejection. Sanding through areas greater than 2 inches in diemeter completely through the first ply or any damage to interior plies must be repaired in accordance with paragraph 4. A damp rag passed over the sanded surface will make the plies show up to determine how many plies have been sanded away.
3.7 Service Damage
Damage to the glass structure will be evidenced by cracked paint, or brooming of glass fibers. Both of these indicators are clearly visible. If either type of indication is present the paint and filler should be sanded away, bare laminate inspected, and repairs made per paragraph 4 as required. Where surface damage has occured it is also likely that local foam crushing has been inflicted.
3.8 Delamination
Delamination of glass/epoxy lap joints is evidenced by physical separation of plies. These defects are easily visible and easily repaired. The leading and trailing edges of flying surfaces (wing, canard, winglets) should be free of delaminations.
3.9 Multiple Defects
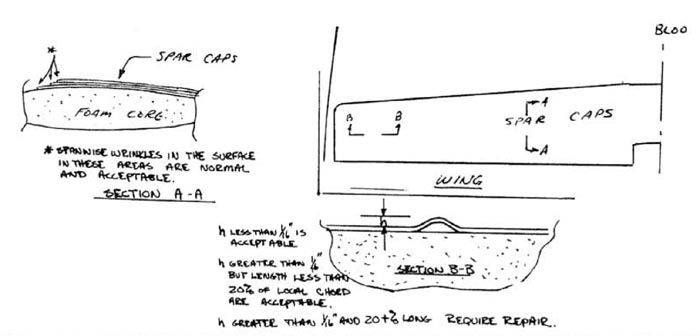
Where multiple types of small defects occur in a leminate (voids, fiber dislocations, and lean areas for example). They should not exceed a total of 10% of the surface area of the laminate, or 20% of the wing chord at any one spanwise position.
4.0 Repairs
There are seldom single defects so massive that a major component must be scrapped. The repair procedures described here may be applied throughout the VariEze and Quickie composite sandwhich structures.
4.1 Small Void Repairs
Voids up to 2 inches in diameter may be repaired by drilling a small hole into the void and injecting the void full of epoxy. A vent hole opposite the injection point is required to allow air to escape.
4.2 Large Defects
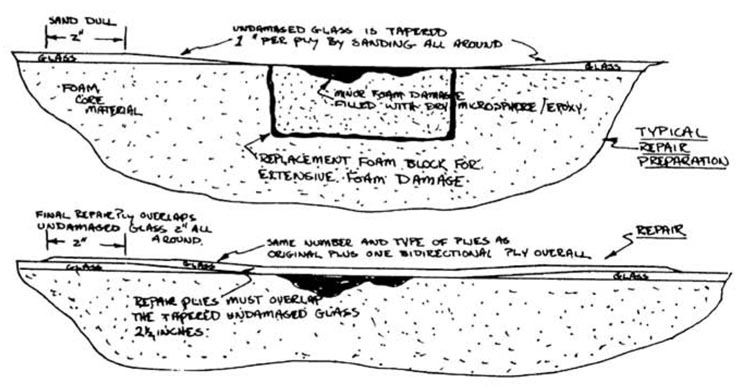
Excessively large voids, lean areas, finishing damage, fiber disruptions, major fiber wrinkles, or service damage may be repaired using this procedure. Remove the rejected or damaged area by sanding or grinding and taper the glass laminate on a slope of approximately 1 inch per ply in all directions. The plies are visible as the sanding is done. The tapered glass edges and surrounding two inches of glass surface must be sanded completely dull. Damaged underlying foam should be removed and the void filled with a dry microsphere/epoxy mixture or a replacement foam piece. The damaged area is then laminated over using the same type and orientation of glass plies removed, each ply lapping onto the undamaged glass at least one inch. The whole repair area is covered with an additional bi—directional glass ply.
4.3 Delaminations
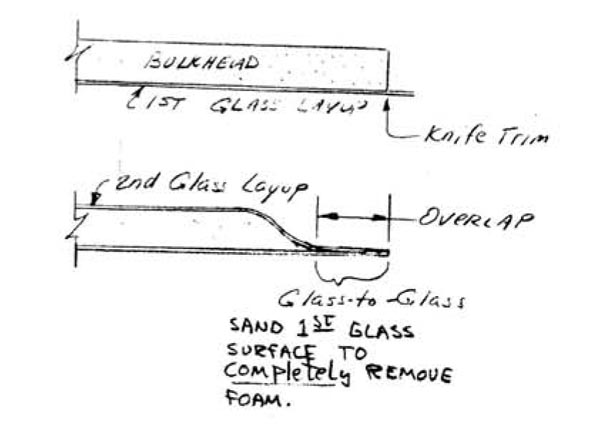
A delaminated joint ahould be spread, the mating surfaces sanded dull, gap filled with flox (epoxy/flocked cotton mixture), then clamped shut while it cures.
5.0 Materials
Since a wide range of similar appearing materials exist which exhibit substantial differences in physical (structural) propertiee Quickie Aircraft Corporation has established a distribution system to provide the amateur builder with proven acceptable materials. QAC strongly discourages the substitution of materials. Homebuilder substitutions for the basic structural materiale constitute major structural modification to the Quickie deeign, and could adversely effect flight safety.
6.0 Applicability
These acceptance criteria are different from and, in some cases, much looser than for similar structures found in sailplanes and other contemporary composite structures. These criteria apply only to the VariEze and Quickie structures. Design safety factors in excess of three enable somewhat relaxed acceptability criteria compared to other similar structures.
