Q1 Plans Chapter 3 Page 3-8
- Details
- Category: Quickie Plans
- Published: Wednesday, 12 November 2008 00:00
- Written by Dan Yager
- Hits: 7833

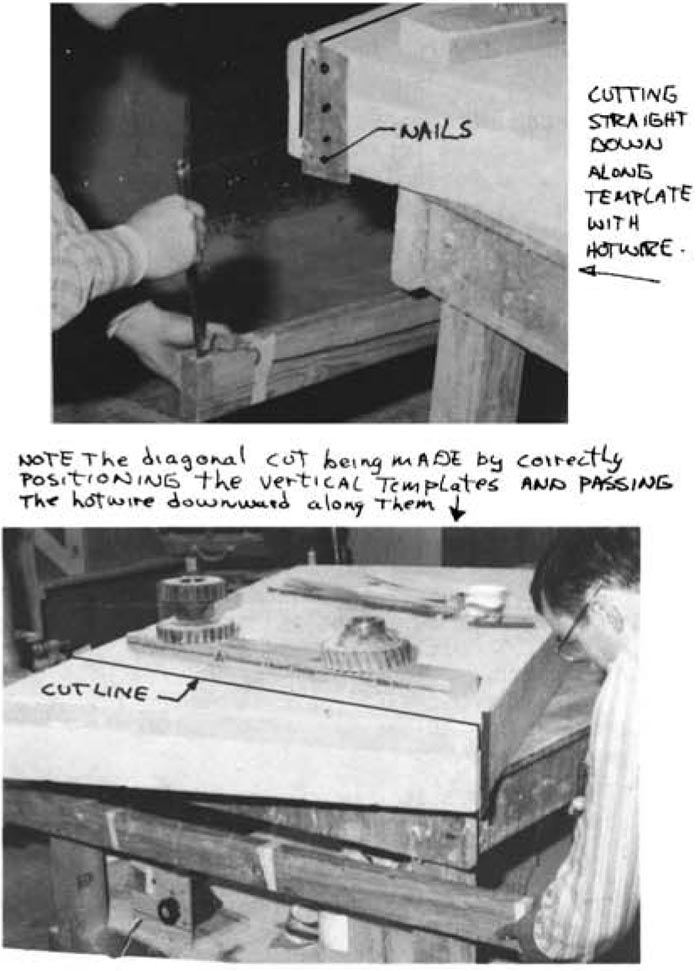
Each template has symbols for the general location of holes for the nails, 4D (four penny) nails are good for this use. The holes in the templates should be a close fit for the nails. Be careful not to angle the nails so that the hot wire can catch on them! Some rib templates are used several times, for both inboard and outboard, this you may have to transfer the talking numbers, pause marks, trim line, and waterline to the opposite side of the template.

The use of the hot wire saw is a simple thing if your equipment is set up properly. Proper wire tension and wire temperature should be maintained for good cutting. The wire tension should be tightened after the wire is hot by twisting one tube with a pair of pliers. The wire should be as tight as possible. The wire should be hot enough to cut one inch of foam in four to six seconds without having to force the wire. A wire that is too hot will burn the foam away excessively. Too cool an over—heated wire, simply turn your voltage control to a lower voltage setting. If you use a battery charger, you will have to add length to the wire. To warm up a cool wire, just increase the voltage setting or, with the charger shorten the wire. Although the foam offers only mild resistance to the hot wire, a long cut will cause the middle of your wire to lag behind the ends. Wire lag can cause problems in tight curves like the leading edge of an airfoil. To reduce lag there, the cutting speed is reduced to about one inch in 8 to 10 seconds. The airfoil templates have notations in the areas where reduced speed cutting is necessary and pause marks where it is necessary to allow the lag to catch up completely.
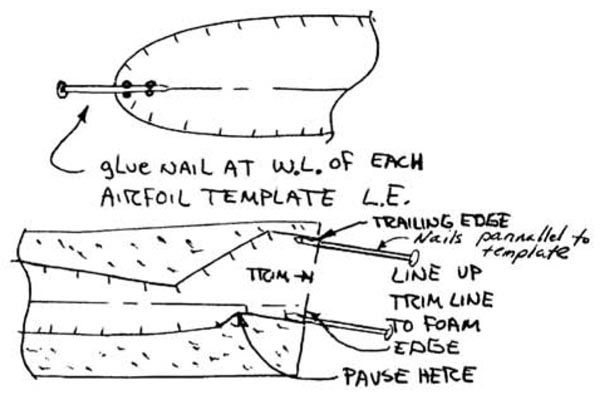
The most common hot wire error is Wire lag which causes a bow in the leading edge. The following method solves this problem and thus we recommend you use it for cutting the canard, wings and winglets. Instead of making one cut all around, glue nails on the templates at the waterline at the leading edge as shown. Now, cut the core in two passes: one from the leading edge up over the top to the trailing edge, the other from the leading edge (under the nail) down under the bottom to the trailing edge. The thin "flash" of foam left on the leading edge due to the thickness of the nails is easily removed with your butcher knife. The result is a perfectly straight leading edge. Care must be taken to assure that both ends simultaneously approach the template at the leading edge. Use the following vocal commands “wire is moving toward the nail, now resting on the nail 1/2 inch from the template (confirm both ends in that position), moving toward template 1/4 inch away, 1/8” away, on the template, moving up X (talking number), Y (talking number)..." When approaching the trailing edge overlap notch (see sketch) slow down and pause 3 seconds in the notch to assure a full, sharp, accurate surface for the skin overlap. See chapter 5, 9 & 10 for clarification of the trailing edge overlap.

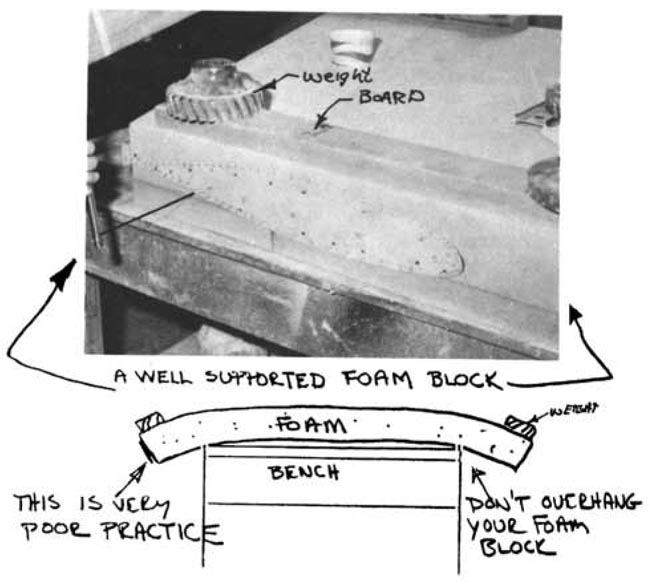
The hot wire should be guided around the templates with light pressures. Pushing too hard against the template may move them or flex the foam block which results in an under cut foam core.


