Q2 Plans Chapter 13 Page 13-03

- Details
- Category: Q-2/Q-200 Plans
- Published: Thursday, 18 May 2006 09:05
- Written by Quickie Aircraft Corporation
- Hits: 2812
|
CANOPY LATCH
..... .....The canopy latch is installed on the left side of the cockpit midway along the left stiffener. .....Find C1 and C2. Make C3. .....Install C1 on the longeron. Next, take C3, a batch of Bondo, and climb into the cockpit. Close the canopy, and position C3 on the left canopy stiffener to match the position of C1, as shown. Hold C3 in position until the Bondo hardens, then gently open the canopy and drill in C3 as shown. It may be necessary to recess C3 into the canopy stiffener, depending on the location of C1. .....Climb back inside the cockpit, close the canopy, and Bondo C2 into position so that the canopy is clamped down tight when the AN525-10R10 screw is slipped into the hole in C2. Drill in C2 while inside the cockpit. .....The canopy latch is very important. With some foam sealing material with adhesive backing in place around the canopy area on the fuselage, the latch should be adjusted so that the handle must be forced into the closed position. (Latch and handle rigged to preload toward each other.) In this fashion, it is impossible to inadvertently open the canopy by bumping against the handle. If you omit the foam seal, the canopy can rattle and wear the engaging surface of C1. The macrame bead is available from nearly any variety store. The foam seal material recommended is MD Foam Tape of size 3/8" thick by 1/2" wide made by the Macklanburg-Duncaun company of Oklahoma City, OK., available at most hardware stores. 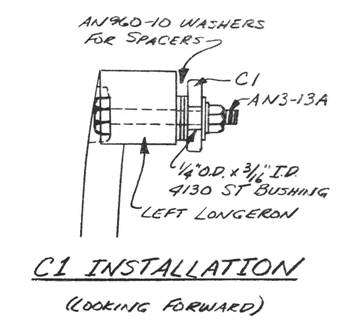 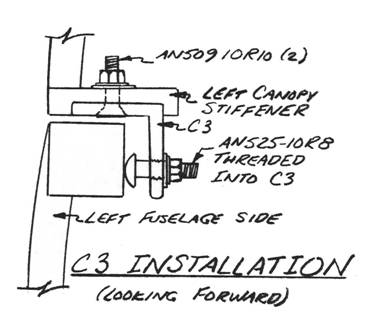   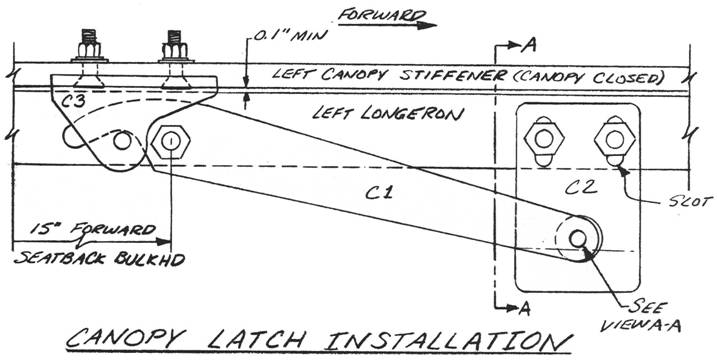 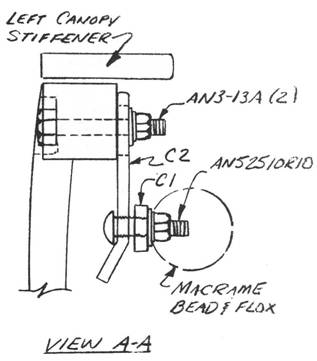 |
||||
|
||||
PAGE 13-3 |
||||